Last reviewed: 17 July 2026
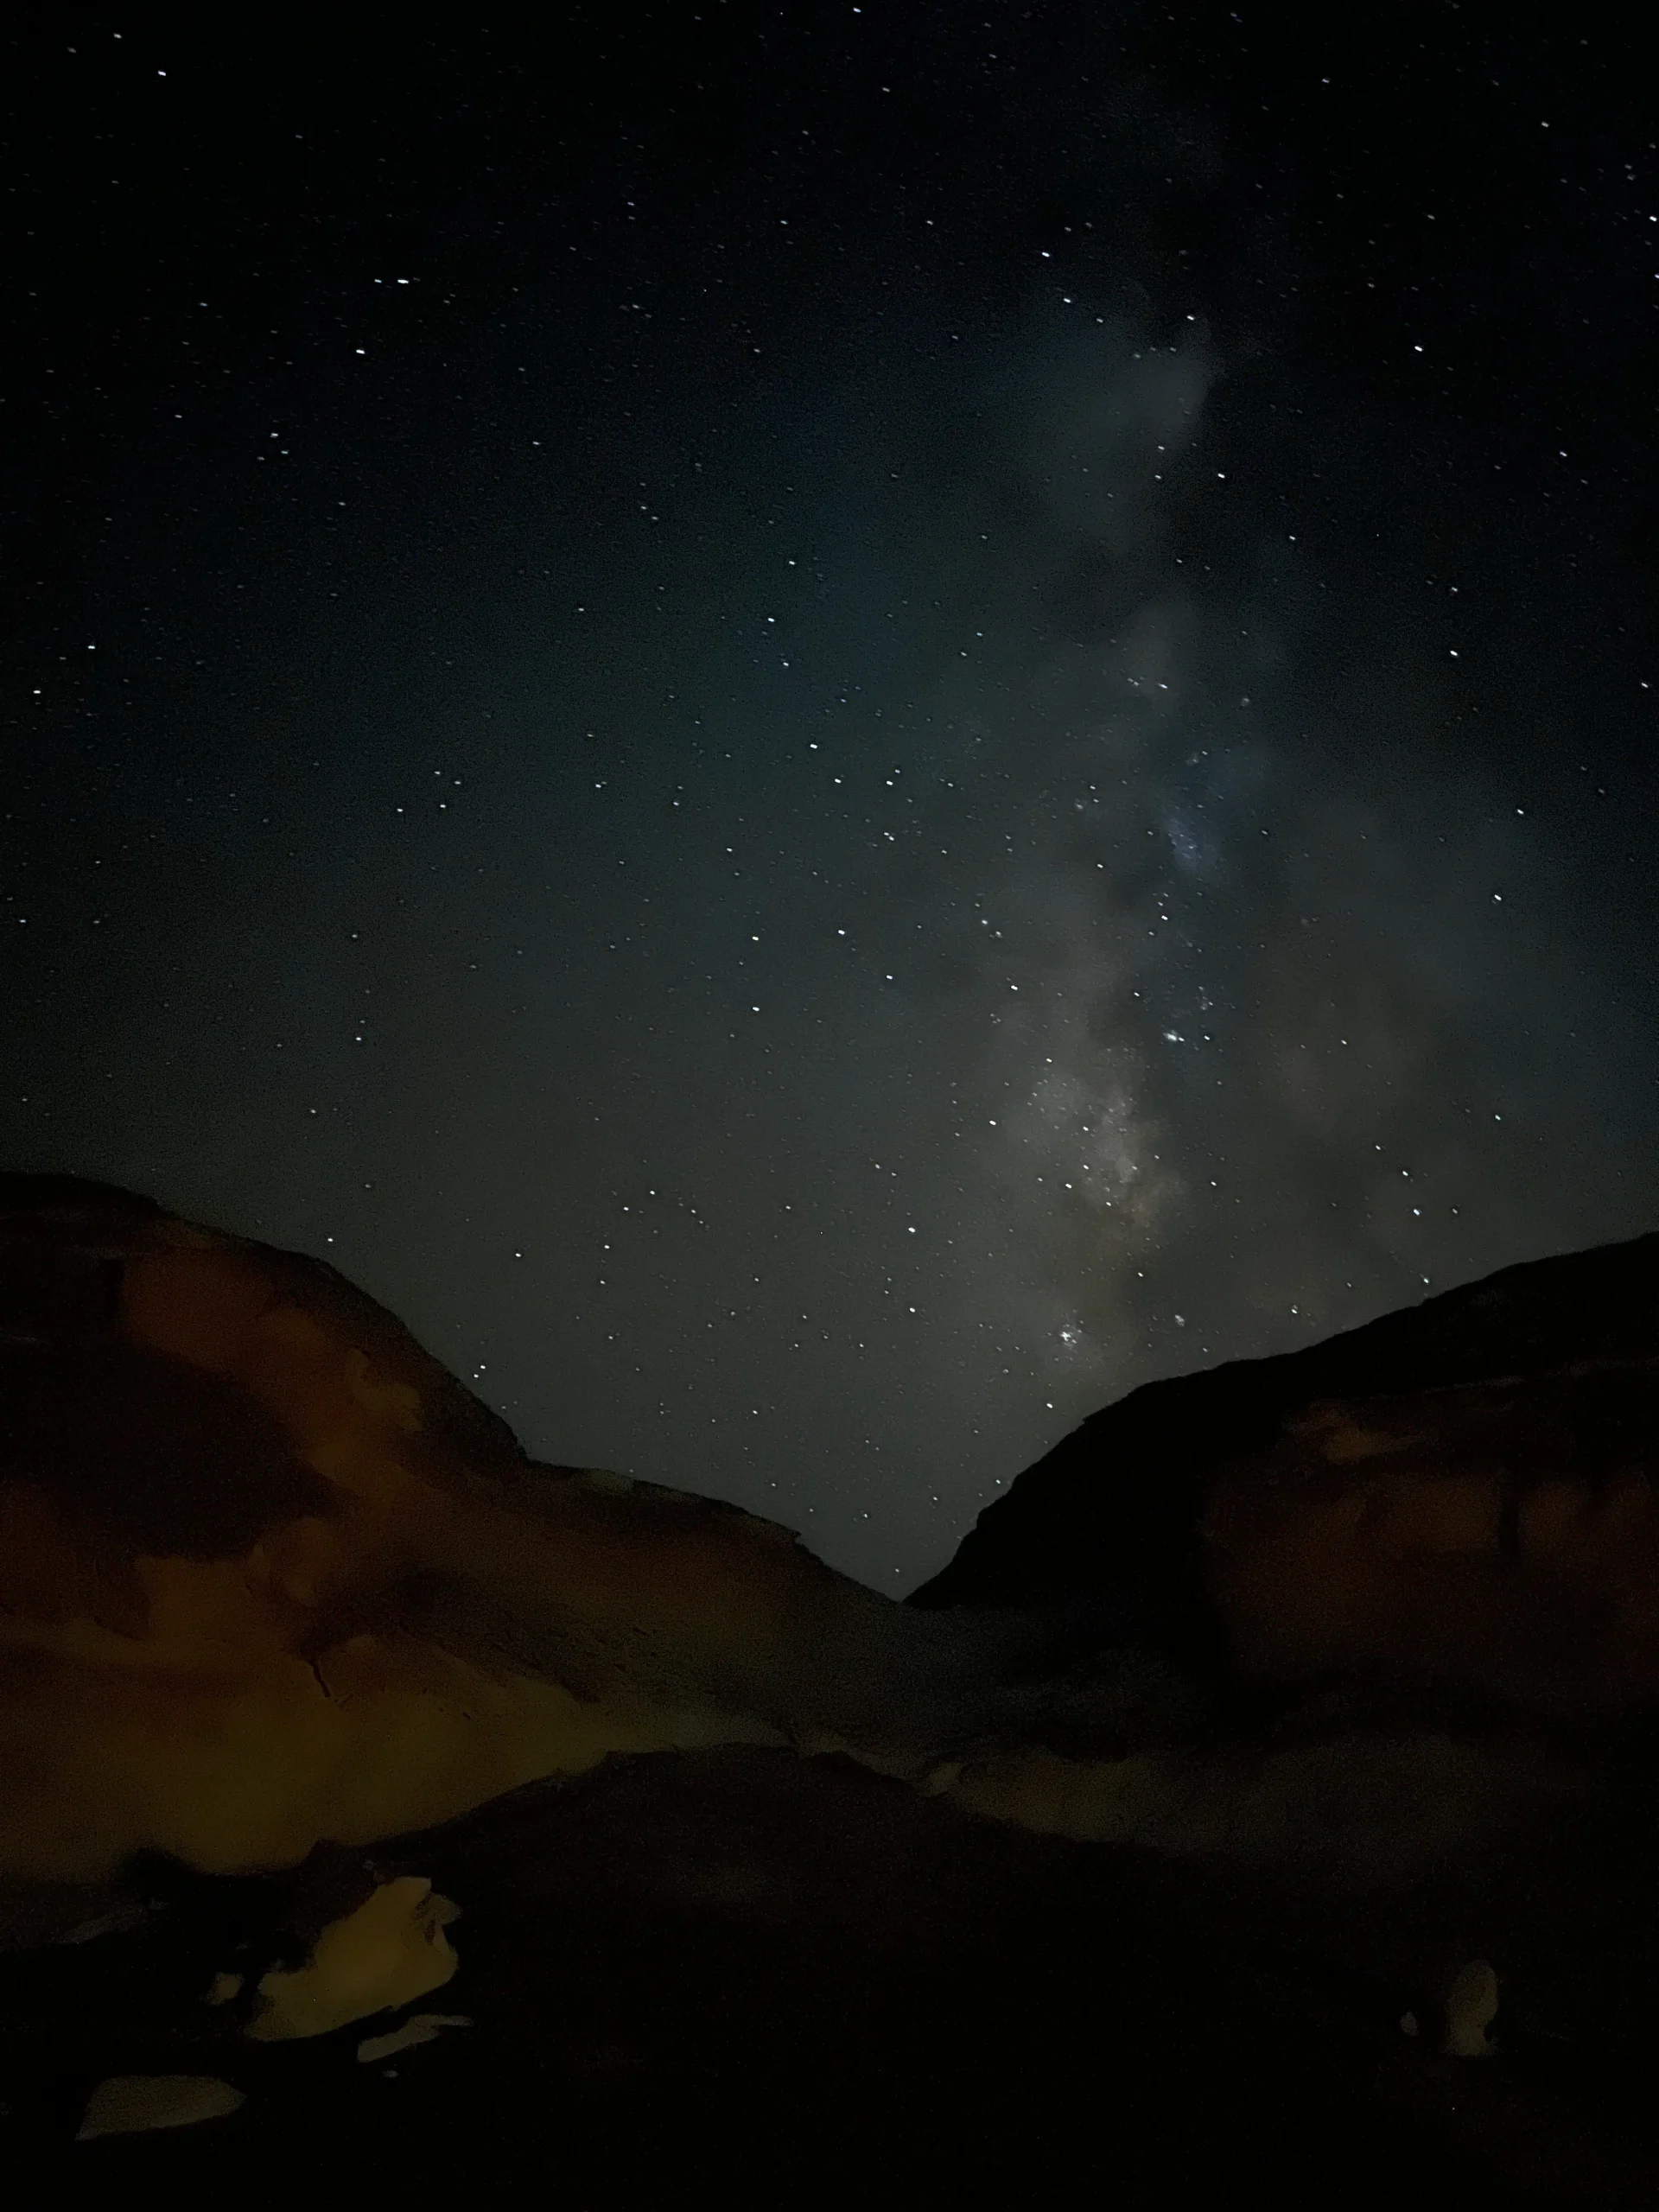
The White Desert combines a wide horizon, sculptural chalk formations and long periods away from city lighting. Those conditions can support memorable stargazing and night photography, but the sky is not identical every night. Moon phase, moonrise and moonset, clouds, dust, humidity, wind, season and the campsite all change what you see and what a camera records.
The first planning decision is your visual goal. A dark, moonless period is generally better for faint stars and detailed Milky Way images. A bright Moon can reduce the visibility of faint stars, but it can illuminate the white formations and create strong night landscapes with a recognizable foreground. Neither condition is automatically “best.”
A successful trip therefore starts with a specific request: do you want the darkest practical sky, a moonlit landscape, star trails, a sunrise sequence, a simple phone photograph or an unhurried night of naked-eye observation? Share that goal before the operator confirms the date and camp plan.
Quick answer: is the White Desert good for stargazing?
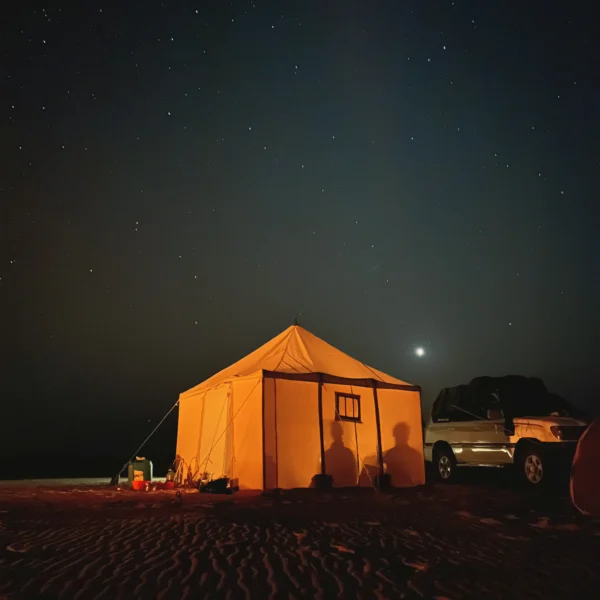
It can be, because the recognized desert route and campsites are far from Cairo’s dense urban lighting. However, no operator can guarantee a cloudless sky, a visible Milky Way core, a meteor shower, zero wind or a particular composition.
Good planning includes:
- checking the Moon’s phase, rise time, set time and direction;
- checking sunset, astronomical dusk and astronomical dawn;
- choosing the season for both sky goals and comfortable camping;
- telling the operator that photography is a priority;
- requesting enough time to scout compositions before dark;
- using a stable tripod and manual camera control;
- protecting equipment from sand and temperature changes;
- keeping artificial light low around camp;
- staying within the guide’s safe walking boundary;
- preparing warm layers and a headlamp;
- accepting that weather and authorized access can change the exact camp.
Stargazing requires very little equipment. Night photography requires more technical preparation, but a modest camera or modern phone can still make useful images when expectations are realistic.
Start with the Moon, not a generic “best date”
NASA describes eight recurring lunar phases, from new Moon through the waxing phases to full Moon and back through the waning phases. The cycle repeats roughly every 29.5 days. Phase is important, but it is only part of the plan.
The Moon may be below the horizon for part of the night even when the phase is not new. A crescent may set early, creating a useful dark window later. A waning Moon may rise after a photographer has already completed a dark-sky session. Conversely, a nearly full Moon can dominate most of the night.
For the actual trip location and date, check:
- percentage illuminated;
- moonrise;
- moonset;
- the Moon’s direction;
- its altitude during the planned session;
- the dark interval between astronomical dusk and moonrise or between moonset and dawn.
Do not rely only on a calendar icon. Use a reputable astronomy or ephemeris tool configured for the White Desert or nearby Bahariya/Farafra coordinates, and check again close to departure.
New Moon versus full Moon: choose by subject
Near the new Moon
A new-Moon window gives the best chance of a naturally dark background, assuming clear air and low artificial light. It suits:
- dense star fields;
- Milky Way detail;
- faint constellations;
- lower-contrast star trails;
- night panoramas;
- naked-eye dark adaptation.
The challenge is the foreground. White formations can become silhouettes or disappear unless the photographer exposes separately, uses carefully controlled low-level light, works during twilight or accepts a dark foreground.
Around the full Moon
A bright Moon acts like a changing directional light source. It can reveal texture in the chalk, illuminate the sand and help a camera record foreground detail with less artificial lighting. It suits:
- moonlit desert landscapes;
- portraits that show the environment;
- formations with visible texture;
- long exposures with lower ISO;
- compositions where the Moon itself is included.
The trade-off is reduced contrast for faint stars. If the Moon is high and close to the camera’s viewing direction, the sky can appear washed out. Lens flare may also become a problem.
Quarter and crescent phases
Intermediate phases often provide the most flexible schedule. You may photograph a lit foreground for one part of the evening and use a darker period after moonset or before moonrise. This can be more productive than insisting on the exact night of new Moon.
Moon direction changes the photograph
Illumination percentage does not tell you how the light reaches the formation. Side light can reveal texture, while front light may flatten it and backlight may create a silhouette or glow around edges.
Before the trip, imagine the composition:
- Which direction will the camera face?
- Where will the Moon rise or set?
- Will the formation block the Moon?
- Will camp lights be behind the camera or inside the frame?
- Does the foreground need twilight, moonlight or separate exposure?
The guide chooses an authorized and safe camp, not a studio set. Explain the desired direction and subject, but do not expect an exact online photograph to be reproduced. Wind, access, other camps and environmental restrictions can make another location more appropriate.
Sunset is the beginning of the night workflow
Arrive with enough daylight to walk only within the guide-approved area and find foregrounds safely. Mark tripod positions mentally, identify holes or uneven ground and note the route back to camp.
A useful sequence is:
- Late golden light: photograph warm side light and long shadows.
- Sunset: expose for the sky and make silhouettes.
- Civil twilight: balance remaining sky color with visible formations.
- Nautical twilight: work with deeper blue and brighter stars.
- Astronomical dusk: begin the darkest-sky exposures.
- Moon window: adjust composition and exposure as moonlight changes.
- Pre-dawn: photograph zodiacal color or silhouettes when conditions allow.
- Blue hour and sunrise: complete the sequence before packing.
The US National Weather Service defines the end of evening astronomical twilight when the Sun reaches 18 degrees below the horizon. That is a more useful dark-sky reference than “30 minutes after sunset,” because twilight duration changes with date and latitude.
What can you see?
The visible sky depends on the date, time and atmosphere. Common naked-eye targets may include bright planets when they are above the horizon, familiar constellations, the Moon, satellites, meteors and the brighter band of the Milky Way when its position and conditions align.
Do not advertise a planet, meteor shower or Milky Way core without checking the specific date. Celestial objects rise and set, planets move relative to the stars, and meteor activity is variable. Even during a predicted shower peak, clouds, moonlight and natural variation affect the result.
A star-chart app can help identify objects, but download its data before leaving reliable signal. Use night mode or a dim red screen so one bright phone does not reset everyone’s dark adaptation.
Milky Way planning in Egypt
From Egypt’s Northern Hemisphere location, the brighter galactic core is generally a seasonal target rather than an all-night, year-round guarantee. It becomes more accessible during parts of spring and summer, with timing and orientation changing through the season. Winter offers different constellations and longer nights but not the same core position.
This creates a practical trade-off. Warmer months may improve the core’s timing but bring greater heat and sometimes less comfortable camping. Cooler months may provide longer, more comfortable nights and prominent winter constellations.
Check a current sky-planning tool for the exact date and location. The best time to visit the White Desert guide covers weather and travel comfort; combine it with astronomical planning rather than treating either factor alone as decisive.
How long should your eyes adapt?
The simplest stargazing improvement is reducing artificial light. Give your eyes time in darkness and avoid repeated exposure to bright white light. A red headlamp at its lowest usable level is less disruptive for many observers, but it should still point down and remain off when not needed.
Ask the camp team and other guests before the session:
- whether vehicle lights can be minimized;
- when dinner and camp setup require working light;
- where photographers will stand;
- whether anyone is making a time-lapse;
- when a brief controlled light-painting interval may occur;
- when the camp will return to darkness.
A shared trip is not a private observatory. Guests need light for safe movement, food and toilets. If uninterrupted dark periods are a priority, request a private photography trip.
Best trip length for photography
Two days and one night
The two-day White Desert itinerary provides one sunset, one night and one sunrise. It is efficient but weather leaves no second chance. Scouting time may be limited because the first day also includes the Cairo transfer and several desert stops.
Three days and two nights
A longer itinerary can provide two sunsets, two night sessions and two sunrises. It creates more time to adjust to wind, moon position or a failed first composition. It also permits a slower photography pace, but adds cost and another camping night.
Read two days versus three days for the complete logistical comparison. Tell the operator that the extra night is for photography so the route is not simply filled with more daytime stops.
Essential camera equipment
A practical kit includes:
- camera capable of manual exposure;
- wide or moderately wide lens with a large maximum aperture;
- stable tripod;
- remote release or two-second timer;
- spare batteries;
- memory cards;
- lens cloth and manual air blower;
- headlamp with red mode;
- power bank and required cables;
- protective bag or dry bag;
- simple rain or dust cover;
- warm gloves that still allow camera control.
A very fast lens is helpful but not mandatory. Composition, stability, focus and correct exposure matter more than owning the newest body.
Avoid carrying every lens you own. Each lens change in wind creates another opportunity for dust to reach the sensor. A wide lens for sky landscapes and one moderate lens for compressed formations or the Moon can cover most needs.
Starting settings for stars
There is no universal exposure. Camera, sensor, lens, sky brightness, Moon and artistic goal all matter. Use these as test values, not a fixed recipe:
- manual exposure mode;
- RAW capture when available;
- aperture near the lens’s wide end, such as f/1.8 to f/2.8, or the widest useful setting;
- ISO around 1600 to 6400 depending on camera and sky;
- shutter roughly 10 to 25 seconds for a wide lens;
- manual focus on a bright star using magnified live view;
- long-exposure noise reduction tested in advance;
- image stabilization off when the camera is securely tripod-mounted if the manufacturer recommends it.
Make a test frame, enlarge a star and inspect shape and focus. Adjust shutter speed if stars trail, aperture if corner quality is poor and ISO according to histogram and noise.
Do not judge only from the bright rear screen. Lower screen brightness and check the histogram so the image is not much darker than it appears.
The 500 Rule and why it is only a starting point
A traditional guide divides 500 by the full-frame-equivalent focal length to estimate a shutter time before obvious star trails. For example, a wider lens permits a longer exposure than a telephoto lens.
Modern high-resolution sensors can reveal movement sooner, and star position, print size and viewing distance matter. Use the calculation as an initial test, then shorten exposure when stars are visibly elongated. More precise planning tools use sensor size, pixel pitch, aperture and sky position.
If you want trails rather than points, use a deliberate star-trail workflow instead of an accidental slightly blurred exposure.
Manual focus at night
Autofocus often struggles with a dark sky. Before the main session:
- choose a bright star or distant light;
- switch to live view;
- magnify the point;
- focus manually until it is as small and sharp as possible;
- make a test exposure;
- tape the focus ring lightly if the lens moves easily;
- recheck after a temperature change or lens adjustment.
The infinity symbol on a lens is not always the exact focus point. Do not rotate blindly to the mechanical stop.
For a very close chalk formation and distant stars, one exposure may not hold both sharply. Options include focusing at a compromise distance, stopping down with longer exposure, making separate foreground and sky frames, or using focus stacking with transparent disclosure in editing.
Photographing a moonlit landscape
Moonlit scenes are brighter than dark-sky scenes, so reduce ISO or close the aperture as needed. Exposures may range from a few seconds to much longer depending on phase and direction.
Watch the Moon’s highlights and the white chalk simultaneously. The formations can overexpose before the darker sand looks bright enough. Use the histogram, highlight warning and bracketing.
When the Moon appears in the frame, a wide lens renders it small. A telephoto lens makes it larger but compresses the landscape and demands faster shutter speed for a sharp lunar disc. One exposure may not capture both a detailed bright Moon and a darker foreground; blending separate exposures is a creative choice that should not be misrepresented as a single frame.
Star trails
Star trails show Earth’s rotation over time. Instead of one extremely long exposure, many photographers make a sequence of shorter frames and combine them later. This can reduce the risk of losing the entire image to a bump, vehicle light or battery failure.
Plan for:
- a tripod position no one will cross;
- a fully charged battery or safe external power;
- manual focus and manual white balance;
- interval timing with minimal gaps;
- enough storage;
- foreground exposure before or after the sequence;
- no automatic screen or light disturbing the camp;
- protection from wind.
Do not place a tripod on a narrow walking route. Tell the guide and guests that a sequence is running.
Photographing sunrise and sunset
Night specialists should still plan both edges of the day. The White Desert formations respond strongly to low side light, and twilight can produce the most balanced sky-to-ground exposure of the trip.
For sunset:
- scout before the light becomes urgent;
- use a tripod even when shutter speeds are still fast;
- bracket high-contrast scenes;
- protect highlights around the Sun;
- include scale carefully;
- stay off fragile formations.
For sunrise:
- prepare the lens and battery before sleeping;
- check for condensation or dust;
- keep a warm layer on;
- reach the agreed position with the guide;
- shoot through blue hour, not only at the instant of sunrise.
The White Desert camping guide explains the overnight routine so photography can fit around meals, camp setup and departure.
Phone astrophotography
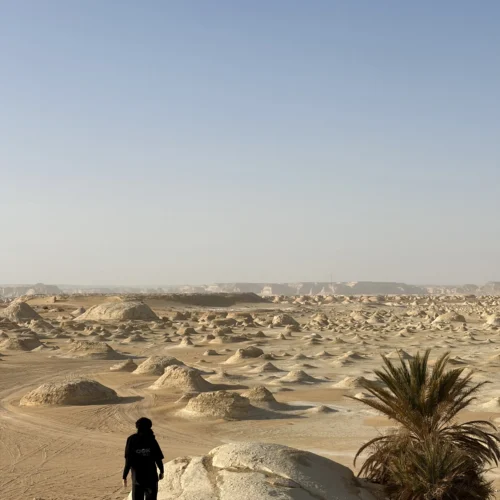
A recent phone with a dedicated night or astrophotography mode can produce a convincing image, especially when it remains completely still.
Use:
- a small tripod and secure clamp;
- rear camera rather than selfie camera;
- night mode with the longest stable capture available;
- timer or remote shutter;
- RAW mode if supported and understood;
- screen brightness reduced;
- lens cleaned before the exposure;
- no digital zoom;
- composition that includes a clear foreground.
Phones combine frames computationally, so moving people, light beams or a shaking tripod create artifacts. Tap focus on a bright distant point if the app allows, and compare a dark-sky version with a short, subtle foreground illumination.
Do not expect the phone preview to match naked-eye perception. Night modes often reveal color and stars the eye did not see as strongly; that is normal computational photography, not necessarily an inaccurate result.
Portraits beneath the stars
A sharp person and sharp stars in one frame require control. Options include:
- keeping the person still for a short exposure;
- using a brief low-power flash;
- making separate person and sky frames;
- using moonlight;
- creating a silhouette.
Get consent before flash or light painting. Warn the subject when the light will fire and prevent beams from pointing toward other photographers or sleeping guests. Avoid making chalk unnaturally bright compared with the sky unless that is the intentional style.
Light painting without disturbing the camp
A low-power warm or neutral light, moved briefly across a formation, can add foreground detail. Too much light creates harsh hotspots, damages night vision and affects every camera nearby.
Agree on a short interval. Start with less light than seems necessary, keep the source moving and inspect the result. Never climb or place lights on formations. Do not leave lights unattended or use a powerful beam toward wildlife.
If another group is camped nearby, their needs matter too. A private camp gives more control but does not create ownership of the landscape.
Dust and sand protection
Canon’s extreme-conditions guidance notes that sand can threaten bodies and lenses. Weather sealing helps but does not make equipment invulnerable.
In the White Desert:
- change lenses inside a sheltered vehicle or tent when possible;
- switch the camera off before a lens change;
- keep the body opening pointed down;
- use a blower rather than rubbing loose grit;
- never blow on the sensor with your mouth;
- clean the tripod legs before collapsing them;
- keep caps in a sealed pocket;
- use a clear protective bag during wind;
- avoid placing the camera bag directly on loose sand;
- complete a sensor-cleaning check before the trip.
Do not attempt an unfamiliar wet sensor clean at camp. A few dust spots are easier to correct later than sensor damage.
Batteries, cold and power
Battery performance can drop during cold nights, long exposures and repeated screen use. Bring more charged batteries than a normal day shoot and keep spares in an inside pocket, protected from moisture and direct body contact with terminals.
Do not assume the camp has mains electricity. Ask whether the vehicle offers charging and whether it remains available after camp setup. Carry a power bank compatible with the phone, headlamp and camera-charging method.
Use airplane mode when signal is absent, disable unnecessary wireless functions and shorten image review. The White Desert packing checklist covers the rest of the overnight equipment.
Condensation and temperature transitions
Moving a cold camera suddenly into warm, humid air can cause condensation on or inside equipment. Keep the camera in a closed bag while it adjusts gradually when moving between environments with different temperature or humidity.
In dry desert conditions the issue may be smaller than in humid climates, but vehicles and accommodations can be warmer than the night air. Do not wipe the sensor or remove the lens while visible condensation is present.
Wind: the hidden enemy of sharp stars
A tripod does not guarantee stability. Extend thicker leg sections first, keep the center column low and hang weight only if it cannot swing. Shield the camera with your body without touching the tripod during exposure.
Remove a loose strap or secure it. Turn off a lens hood if it catches too much crosswind only when flare is not a concern. Make repeated shorter exposures rather than risking one long frame when gusts are unpredictable.
Wind can also lead the guide to move camp. Safety and shelter take priority over the planned foreground.
Clothing and personal safety
Night photographers stand still longer than ordinary guests and become cold sooner. Wear layers, closed shoes and a wind-resistant outer garment. Keep water, headlamp and phone with you.
Tell the guide before walking from camp, remain within the agreed boundary and do not approach a cliff or formation by looking only through a screen. Use a dim light to check the ground before moving the tripod.
Read Is the White Desert Egypt safe? for permits, official guides, weak phone reception, remote medical access and emergency preparation.
Drone and restricted-subject warning
Do not bring a drone based on the assumption that an empty landscape has no restrictions. Drone use and communications equipment are tightly regulated in Egypt. Obtain current written authorization from relevant authorities or leave the aircraft at home.
Never photograph checkpoints, military or police personnel, security installations or sensitive infrastructure. Follow the guide’s instructions and put the camera away immediately when authorities request it.
Ethical photography in a protected landscape
A strong photograph does not justify physical damage or unsafe behavior.
- Do not climb, carve or break chalk formations.
- Do not move rocks to “improve” a foreground.
- Do not feed or chase wildlife.
- Do not leave tape, markers or light stands behind.
- Obtain permission before photographing guides or guests closely.
- Explain composites or major sky replacements honestly when context requires.
- Keep fire, vehicles and lights within the guide’s permitted arrangement.
- Pack out batteries, wipes and all waste.
Geotagging an exact sensitive feature may increase pressure on it. A general White Desert location is often enough.
How to brief the operator
Send a concise request before booking:
- camera or phone;
- main target: Milky Way, moonlit formations, stars, trails or sunrise;
- preferred dates;
- private or shared trip;
- number of tripods;
- need for two night sessions;
- desired camp darkness;
- walking and mobility limitations;
- charging requirements;
- amount of equipment;
- whether a non-photographer is traveling;
- flexibility if weather changes.
Ask the operator to confirm what can realistically be arranged, not to guarantee celestial conditions. The White Desert tour cost guide explains how a private vehicle, extra night and specialized timing affect a quote.
A practical one-night shooting plan
Before leaving Cairo
Charge everything, format cards after backup, synchronize camera clocks, save moon and twilight times offline, download the star map and pack clothing separately from camera gear.
During the road journey
Keep batteries and cameras out of direct sun. Do not leave equipment visible during stops. Use the trip to confirm sunset timing and the guide’s camp plan.
Late afternoon
Scout two simple compositions close to camp. Identify the safe route and test tripod stability. Make dust checks before wind increases.
Sunset to astronomical dusk
Photograph the changing color and foreground. Focus while there is enough light, then recheck on a star. Eat and organize bedding without missing the dark window.
Dark-sky window
Start with single wide frames, then panoramas or a time-lapse. Keep light discipline and communicate before light painting.
Moonrise or moonset
Adjust exposure and direction as the Moon changes the scene. Revisit a formation already photographed in darkness.
Before sleep
Back up to a second card or device if possible, secure the tripod, protect the camera from temperature change and prepare the sunrise lens.
Dawn
Begin before civil twilight, stay within the agreed area, shoot through sunrise and pack after checking the ground for caps, cables and batteries.
Common mistakes
- Booking a date only because an app says “new Moon.”
- Forgetting that moonrise and moonset matter.
- Expecting the Milky Way core in every season.
- Arriving at camp after dark without scouting.
- Using autofocus without checking the result.
- Exposing by the rear screen instead of the histogram.
- Allowing a strap to move in the wind.
- Changing lenses in blowing sand.
- Bringing one battery.
- Shining a bright light across another guest’s frame.
- Walking away without telling the guide.
- Planning a drone flight without authorization.
- Assuming a shared tour will remain dark for hours.
- Promising a meteor count or cloudless sky.
- editing the sky heavily without being transparent.
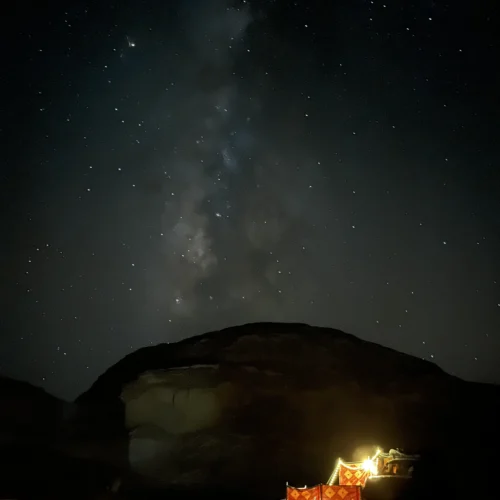
Related White Desert guides: Use the seasonal weather guide, the camping guide, and the White Desert packing checklist to plan night photography conditions and equipment.
Plan a photography-focused desert stay: Explore the White Desert destination and the 3 Days / 2 Nights White Desert Adventure for more time across sunset, night sky and sunrise conditions.
Frequently asked questions
Is the Milky Way visible from the White Desert?
It can be visible when its position, season, sky darkness and atmospheric conditions align. The brighter core is seasonal and moonlight can reduce contrast. Check the exact date and time rather than relying on a general claim.
Is new Moon always the best date?
No. It is best for the darkest natural sky, but moonlight can reveal the formations. A crescent or quarter Moon may provide both lit and dark intervals.
Can I photograph stars with a phone?
Yes, especially with a phone that has night or astrophotography mode. Use a tripod, rear camera, timer and clean lens. Results vary by model and conditions.
Do I need a telescope?
No. Naked-eye viewing, binoculars and a wide-angle camera are often more practical. If bringing a telescope, confirm vehicle space, dust protection and setup time.
What lens should I bring?
A wide, fast lens is the usual starting point for stars plus formations. A moderate or telephoto lens helps with the Moon and compressed landscapes. Limit lens changes in wind.
What camera settings should I use?
Start with manual exposure, a wide aperture, high ISO and a shutter short enough to keep stars point-like. Test and adjust for the actual camera, lens, Moon and wind.
Will the camp have electricity?
Do not assume it. Bring charged batteries and power banks and ask whether vehicle charging is available.
Can the camp turn off all lights?
Essential cooking, safety and toilet lighting may be needed. A private trip provides more control. Agree on dark intervals rather than demanding total darkness throughout camp operations.
Is winter or summer better?
Cooler months offer longer, more comfortable nights and prominent winter skies. Parts of spring and summer can improve timing for the galactic core but may bring greater heat. Choose for both astronomy and physical comfort.
Can the operator guarantee clear skies?
No. Forecasts help, but cloud, haze, dust and wind can change. A second night increases opportunity but still does not guarantee conditions.
Can I fly a drone at night?
Do not assume drone use is legal. Egyptian restrictions are strict and require current authorization. Leave the drone at home unless you hold the necessary written approvals.
Is astrophotography safe for solo travelers?
Use a licensed operator and official guide, remain within the camp boundary and tell the guide before every nighttime movement. Do not walk into the desert alone for a composition.
Final booking checklist
Before confirming:
- define the primary visual goal;
- check phase, moonrise, moonset and direction;
- check astronomical dusk and dawn;
- check seasonal sky position;
- choose one or two nights;
- request private timing when needed;
- confirm permits and official guide;
- confirm tripod and luggage space;
- confirm power limitations;
- pack dust protection and batteries;
- agree on camp-light etiquette;
- check weather close to departure;
- share the route with a trusted contact;
- accept that camp and route can change;
- plan a sunrise sequence;
- leave no equipment or waste behind.
The White Desert rewards photographers who plan carefully but remain flexible. The sky, Moon and landscape will not reproduce someone else’s image on command. Use the available conditions: dark skies for faint stars, moonlight for textured chalk, twilight for balance and sunrise for a final change of color.
Sources checked
- NASA: Moon Phases
- NASA: Earth’s Moon
- US National Weather Service: Twilight Types
- Canon: Night Sky and Star Photography Tips
- Canon: Shooting in Extreme Conditions
- Nikon: Landscape Astrophotography
- Adobe: Milky Way Photography
- Experience Egypt: Natural Wonders in Al-Bahariyya
To request a private White Desert photography itinerary with appropriate moon timing, camp planning and an extra night if required, contact Elzaghandi Travel on WhatsApp.